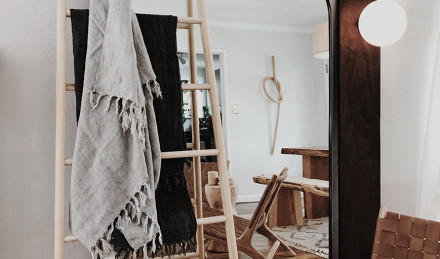
Blanket ladders are everywhere. In the bathroom, bedroom, living room – you name it! But the trend doesn't come as a surprise to those of us who hoard Parachute throws and are endlessly out of storage – sound familiar? Cue a D.I.Y. blanket ladder: the functional yet stylish fixture you can build yourself. Before you freak out because it seems like a lot of work, rest assured that it truly is just a few steps. Here to break it down is Oakland-based wood worker, Aleksandra Zee, who has been designing pieces for her home and other’s going on 12 years. She recently held a blanket ladder D.I.Y workshop, using Parachute throws for styling. We asked her to share her steps so you, too, can incorporate this space saver into your space. If you've got an hour, a friend and some heavy duty tools – pay attention...
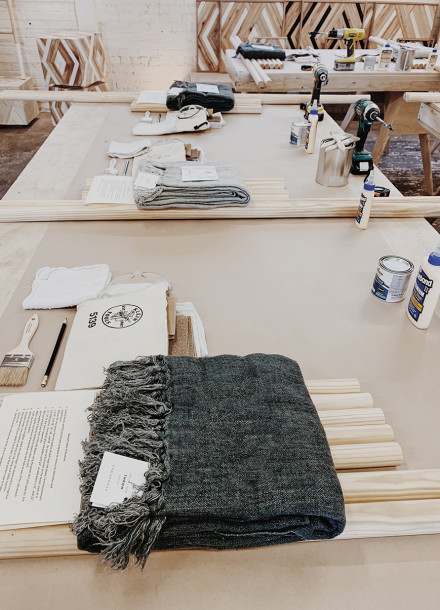
Materials
2 6-foot guard rails (rounded wood)
5 1.¼” dowels (cut at least to 24″.)
Pencil
3 rags
Optional: Paint, blue painter’s tape, paint brush

Materials
2 6-foot guard rails (rounded wood)
5 1.¼” dowels (cut at least to 24″.)
Pencil
3 rags
Optional: Paint, blue painter’s tape, paint brush
1. Sand
Sand all dowels with 60 and 220 grit sandpaper to remove any blemishes and imperfections.
1. Sand
Sand all dowels with 60 and 220 grit sandpaper to remove any blemishes and imperfections.
2. Measure
Measure for cross pieces from the bottom of each large side dowel. First measurement is at 18”, then 28”, 38”, 48” and 58”. Be sure to find center on the dowel, mark at ¾.
2. Measure
Measure for cross pieces from the bottom of each large side dowel. First measurement is at 18”, then 28”, 38”, 48” and 58”. Be sure to find center on the dowel, mark at ¾.

3. Cut
Cut middle pieces. The bottom piece should be cut to 24”, second piece is 23”, and 22”, 21”, 20” for the next 3 sequentially.
3. Cut
Cut middle pieces. The bottom piece should be cut to 24”, second piece is 23”, and 22”, 21”, 20” for the next 3 sequentially.
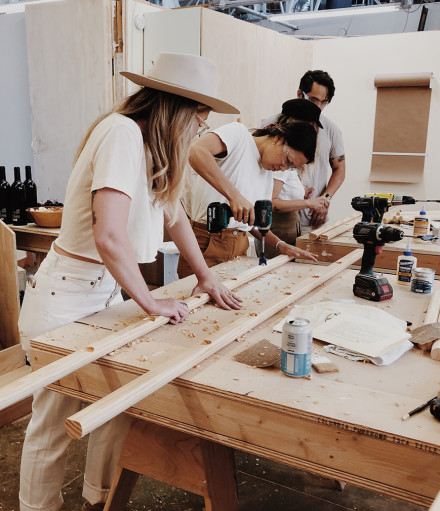
4. Drill
Drill your holes in the side dowels using the power drill and spade bit. Ask a friend to help by holding the dowel while you drill.
4. Drill
Drill your holes in the side dowels using the power drill and spade bit. Ask a friend to help by holding the dowel while you drill.
5. Glue
Apply a quarter size amount of wood glue into each hole on one of the side dowels. Insert your cross dowels.
5. Glue
Apply a quarter size amount of wood glue into each hole on one of the side dowels. Insert your cross dowels.
6. Attach
With the help of your neighbor, attach the other large side dowel and fix it together.
6. Attach
With the help of your neighbor, attach the other large side dowel and fix it together.
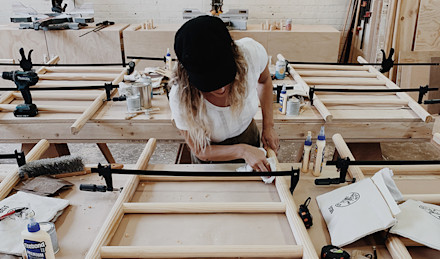
7. Clamp
Using two clamps, one on bottom and one on top clamp your ladder together.
7. Clamp
Using two clamps, one on bottom and one on top clamp your ladder together.
8. Paint
If painting the bottom of your ladder use blue painters tape to make your division line and paint.
8. Paint
If painting the bottom of your ladder use blue painters tape to make your division line and paint.
9. Sand
One final sand to remove any excess glue or imperfections!
9. Sand
One final sand to remove any excess glue or imperfections!

10. Style
Style your blanket ladder with your favorite throws. Not only do they provide a storage solution, but they act as a styled focal point. Bonus: it's a fun way to add a little personality to a space while making it feel even more minimal and modern.
10. Style
Style your blanket ladder with your favorite throws. Not only do they provide a storage solution, but they act as a styled focal point. Bonus: it's a fun way to add a little personality to a space while making it feel even more minimal and modern.
